


 Set up the shared identity that helps your team recognise the workspace. Company details, where available, also supply information for generated documents.
You need Manage workspace settings. Check the workspace switcher before editing: these changes
affect everyone in the selected workspace.
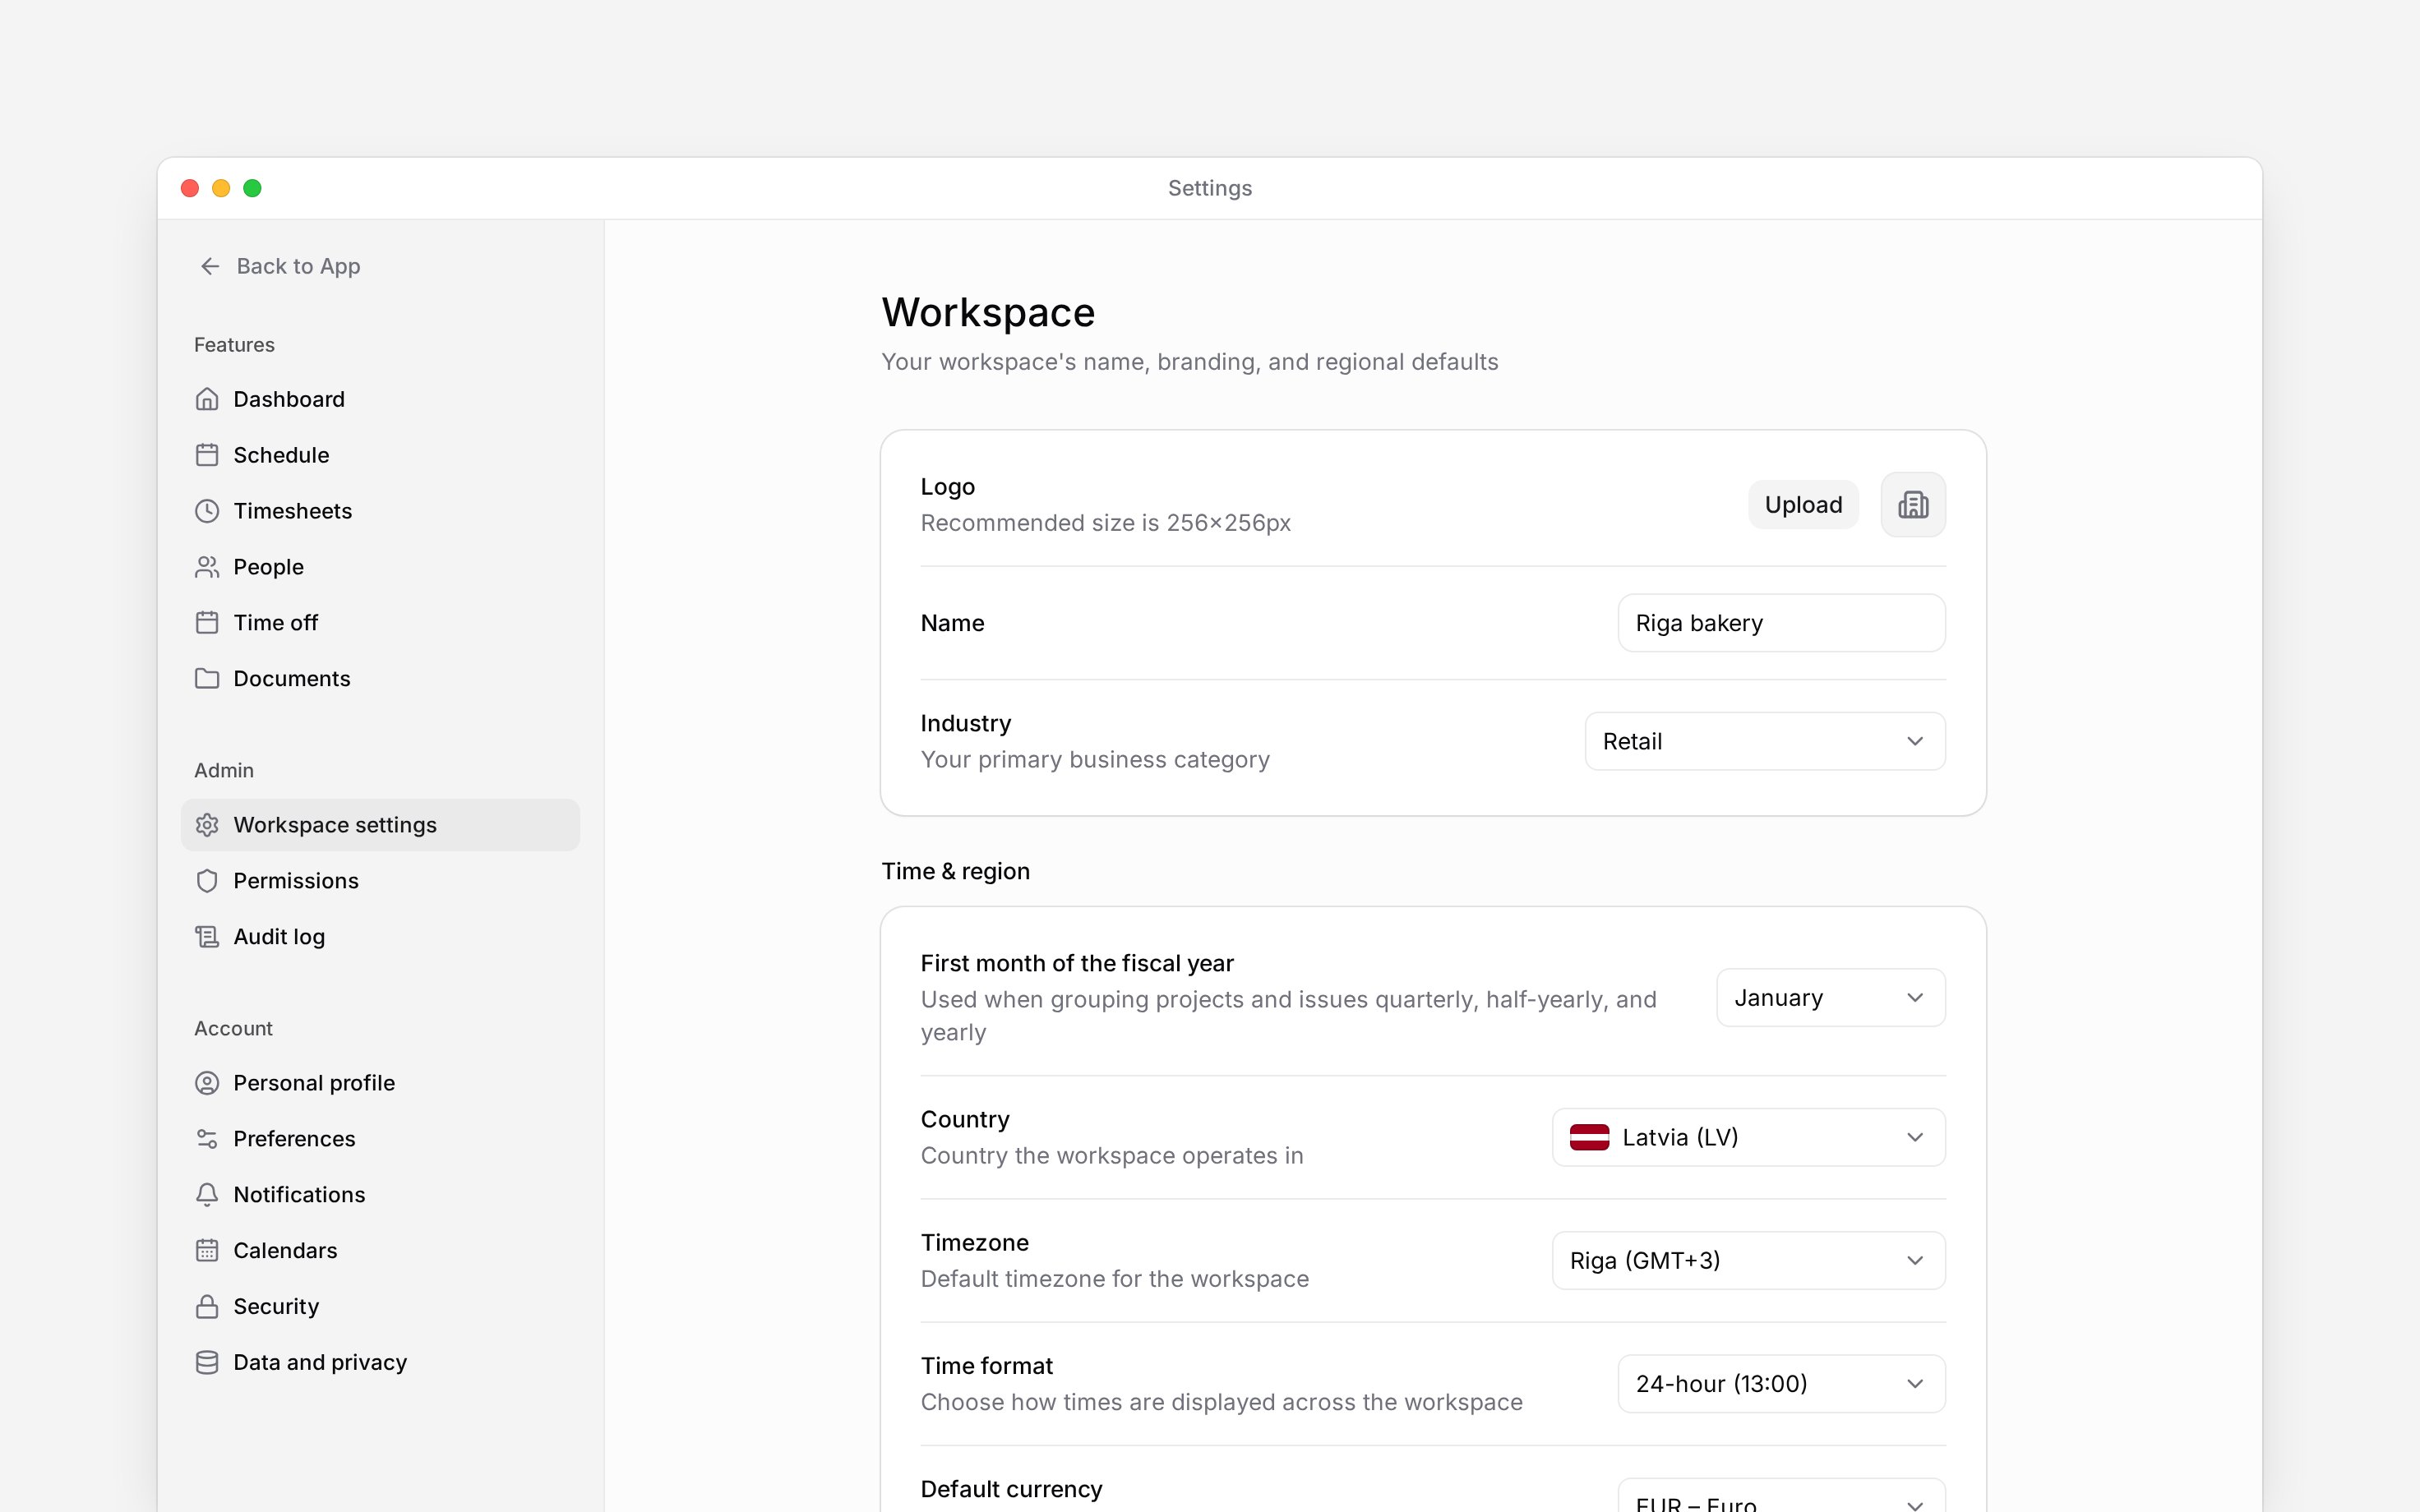
Set the name and branding
1
Open Workspace settings
Go to Settings → Workspace settings. The first group holds the workspace identity.
2
Set a recognisable name
Edit Name. Use a name your team will recognise in the workspace switcher, especially if you
manage several workplaces. Wait for the saved confirmation after typing.
3
Add the logo
Select Upload beside Logo, or Change when a logo already exists. Choose a square
image; 256 × 256 pixels is the recommended size. Use a PNG or JPEG under 5 MB; SVG files are not
accepted. Use Remove if the workspace should have no logo.
4
Choose the industry
Select the industry that best describes your organisation. The choice saves when selected.
Add company details
If contracts are enabled for your workspace (see Creating and signing contracts), the same group also shows Legal name, Registry code and Company address. Enter the registered company details used in generated documents, rather than the short workspace name your team uses. These fields save after you finish typing. If they are missing, the capability is not available in this workspace; changing your industry or name does not enable it.Workspace identity and invoice details have different purposes. To change the billing contact or
details on invoices, use Billing.
Finish shared setup
Check Regional settings before inviting people. Country, timezone, language and currency defaults affect how your team sees and uses workspace data. To keep a full copy of the records, use Export workspace data. To close the workspace, follow Delete a workspace.Next
Regional settings
Set shared country, time, language, and currency defaults.
Billing and plans
Check which features your plan includes.
Still need help?
Contact support
Email the Begin team and we’ll get back to you.
Ask Begin AI
Open the AI assistant and get instant answers based on these docs.